When we had a single crash in our first focus group, I didn’t think much of it. But when we had 3 crashes in our second focus group, something was definitely wrong. I had done preliminary testing but nothing that had showed frequent crashes so I had to think of the best way to crash the game. After adding a bunch of log files into the code and clicking hotspots as fast as possible until it crashed, I found that it was crashing in code I hadn’t even written. Google provided code for displaying 360 video and we were using that to switch between the multiple videos we recorded.

After enabling some developer options in the daydream app, I monitored the resources that the game was using. What I found was that each time a video switched, more ram was being acquired but nothing was being released. This caused the memory to shoot from 200 Mb of default running to 500+ Mb, which is much larger than an app like this is allowed to run on. Each of our video files was about 20 Mb of data, which is the amount the ram jumped each time a video was switching. The provided 360 video code was not cleaning up the resources it was using.

Since the first focus group involved playing the game in an easy difficulty, the students were able to go through the game without having to switch between videos more than what the game was able to do. The second group, however, was playing a much more difficult version. This meant that they used more video switches and played the game longer, which eventually used up the resources that the game could use.

Fixing this issue was going to be a challenge. Since the game is run through unity which used C# as its language of choice, I had limited access to resource management. C# uses its own “garbage collection,” whereas plain C would force me to allocated and free all the memory I wanted to use. I needed to figure out a way to force the script to clear its memory before switching videos without impacting performance. Luckily I knew from previous experiences that disabling an object that had a script attached to it would cause all the running variables in that script to be deleted.

My first approach was to disable then re-enable the video player object right before playing a video, but this caused more frequent crashing. My mistake was that disabling and re-enabling the object took a long time to actually clear the memory and start a new instance. When the game would try to run the script attached to video player, it would be trying to run a disabled script which would in turn crash the game.

My second and final approach was to space out the disable and re-enable. By disabling the video player right after it left the code that signified that the video was done playing and then re-enabling the video player before it had to actually use the methods, it was given enough time to flush the memory of the video player and start a new instance before a new video started playing.

To make sure this was in fact the correct solution, I compiled the game and loaded it on the phone with the developer options enabled. I was able to verify that the memory was staying at a steady 200 Mb and not increasing linearly with each switch of the video. Once that was verified, I needed to do a stress test. Before the game was only able to run around 10-15 videos before it crashed, the stress test I did preformed 100 video switches and it still had no signs of crashing or slowing down. To make sure it would continue to work I left it running for 24-hours and then tried to do another 50 video switches while checking the memory. All was good and the game didn’t crash. The next day I ran through another 100 video switches and did not experience a crash again.
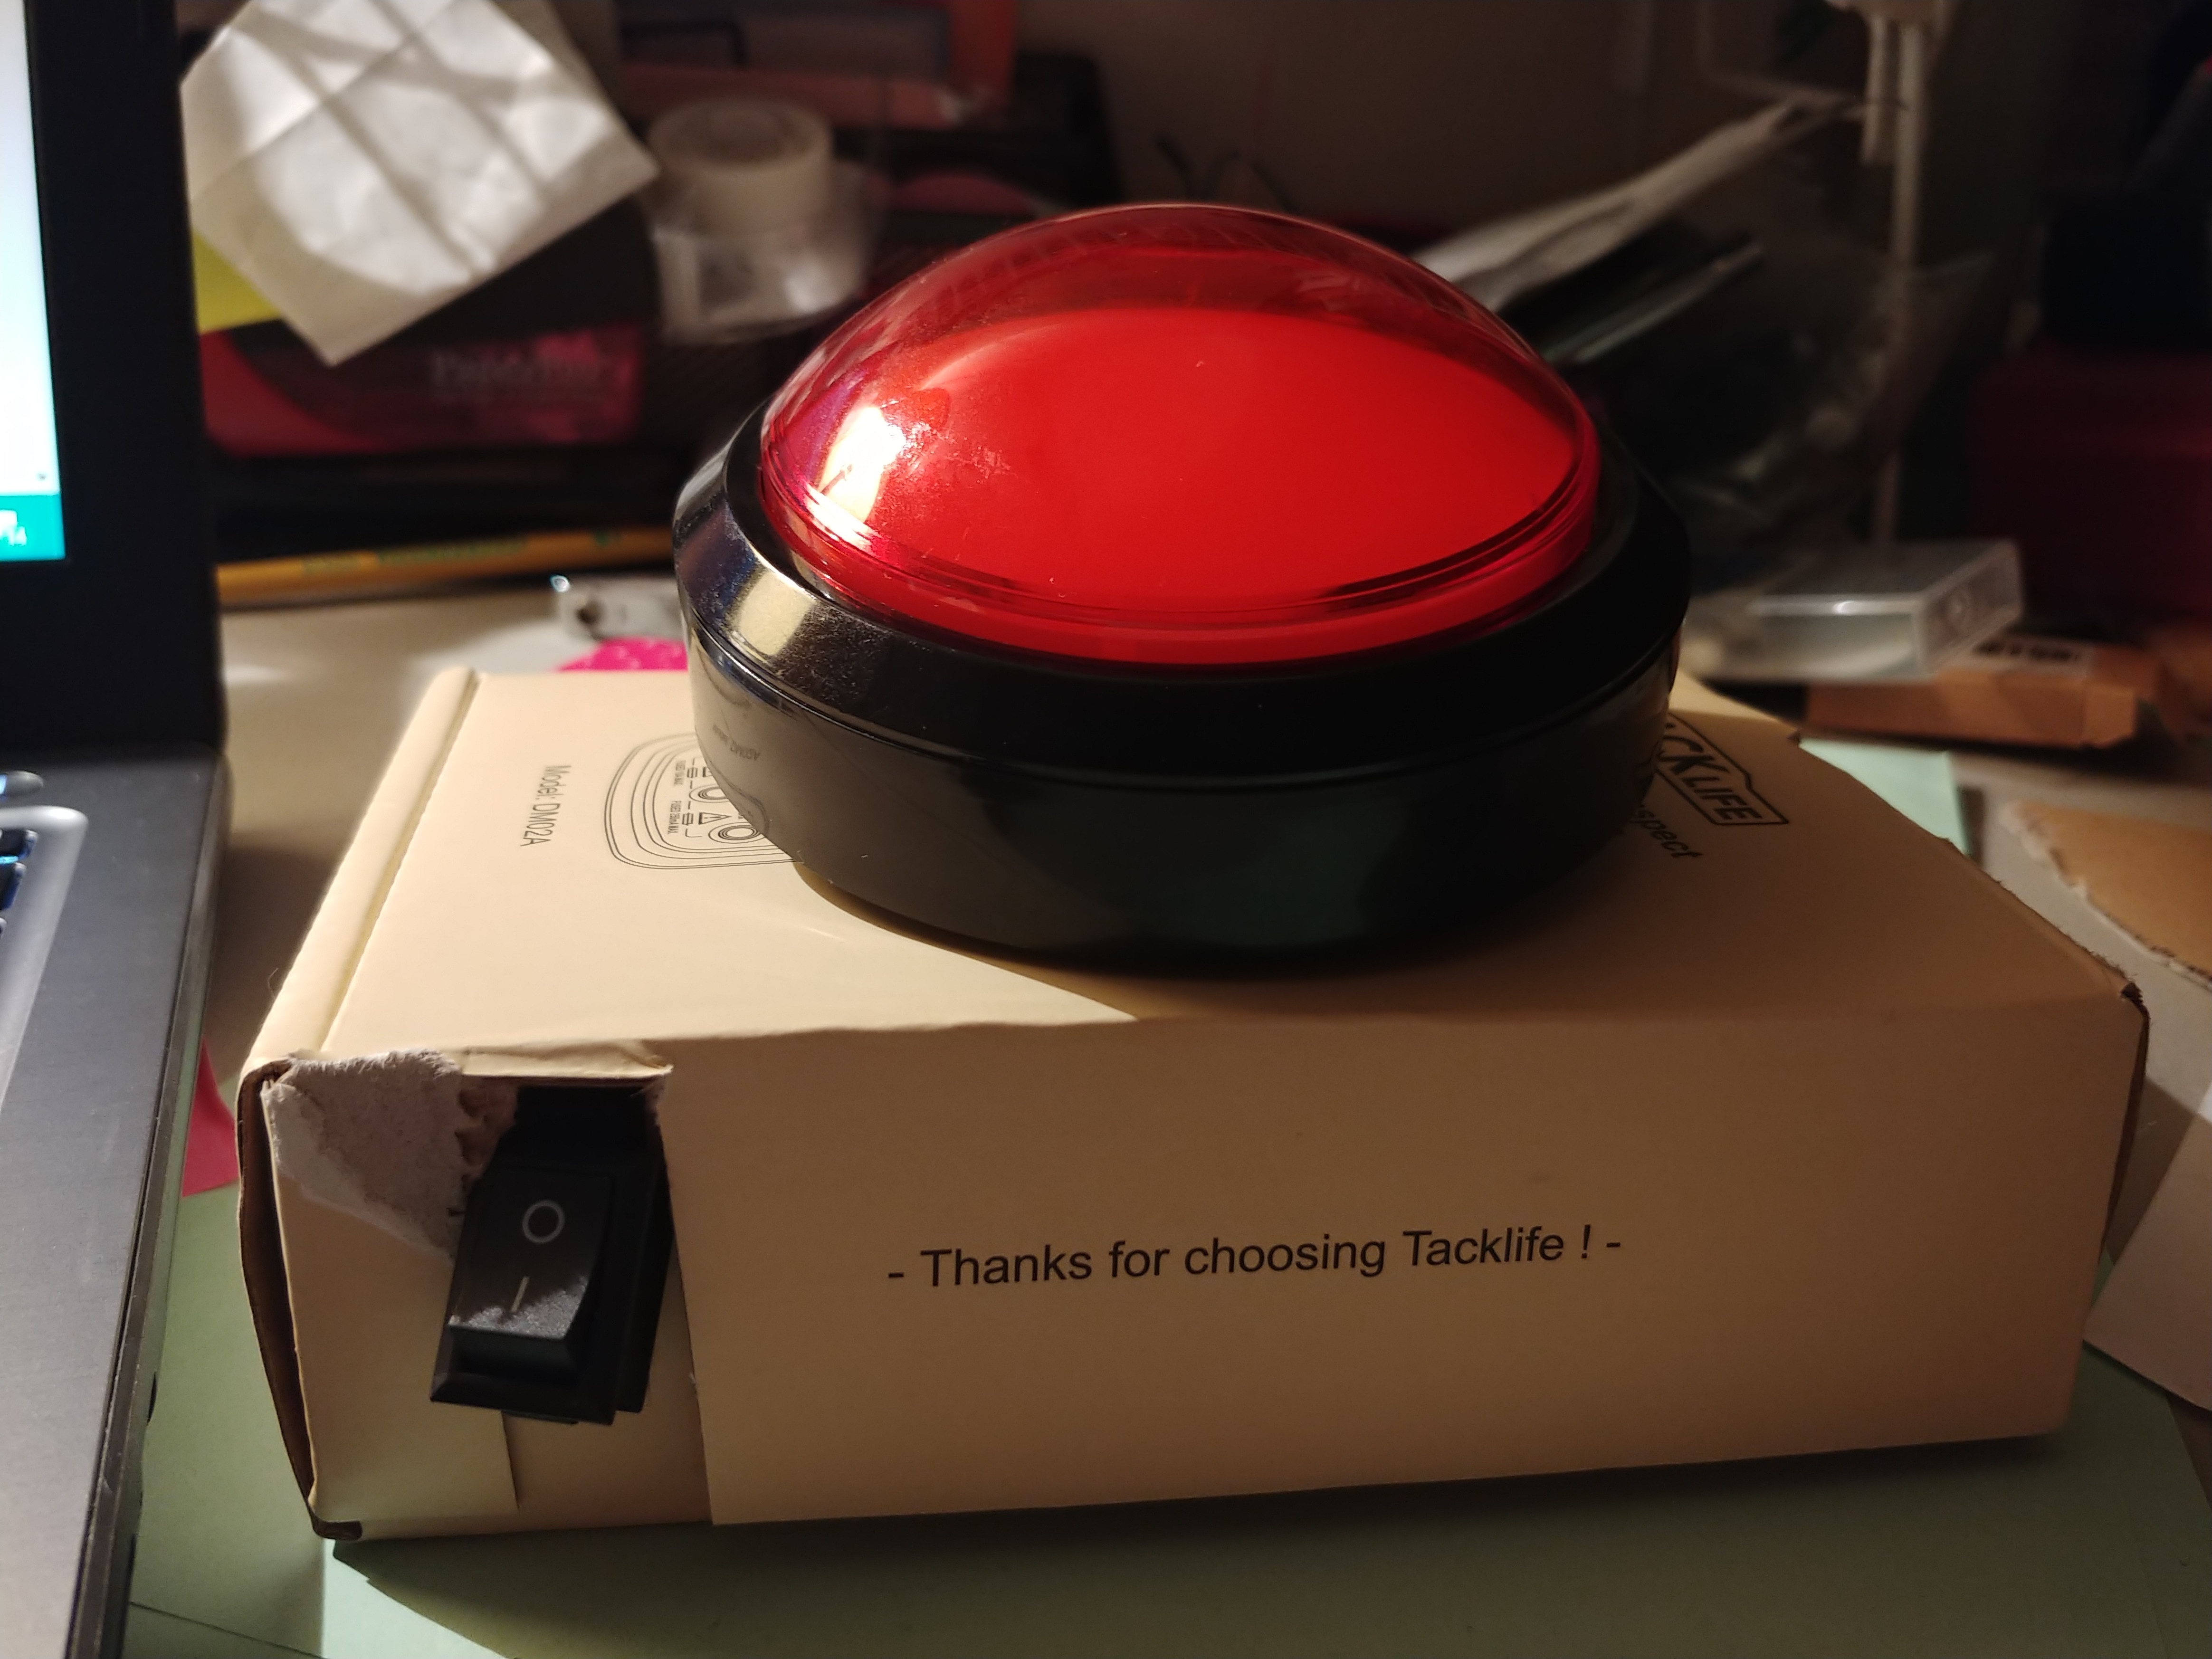
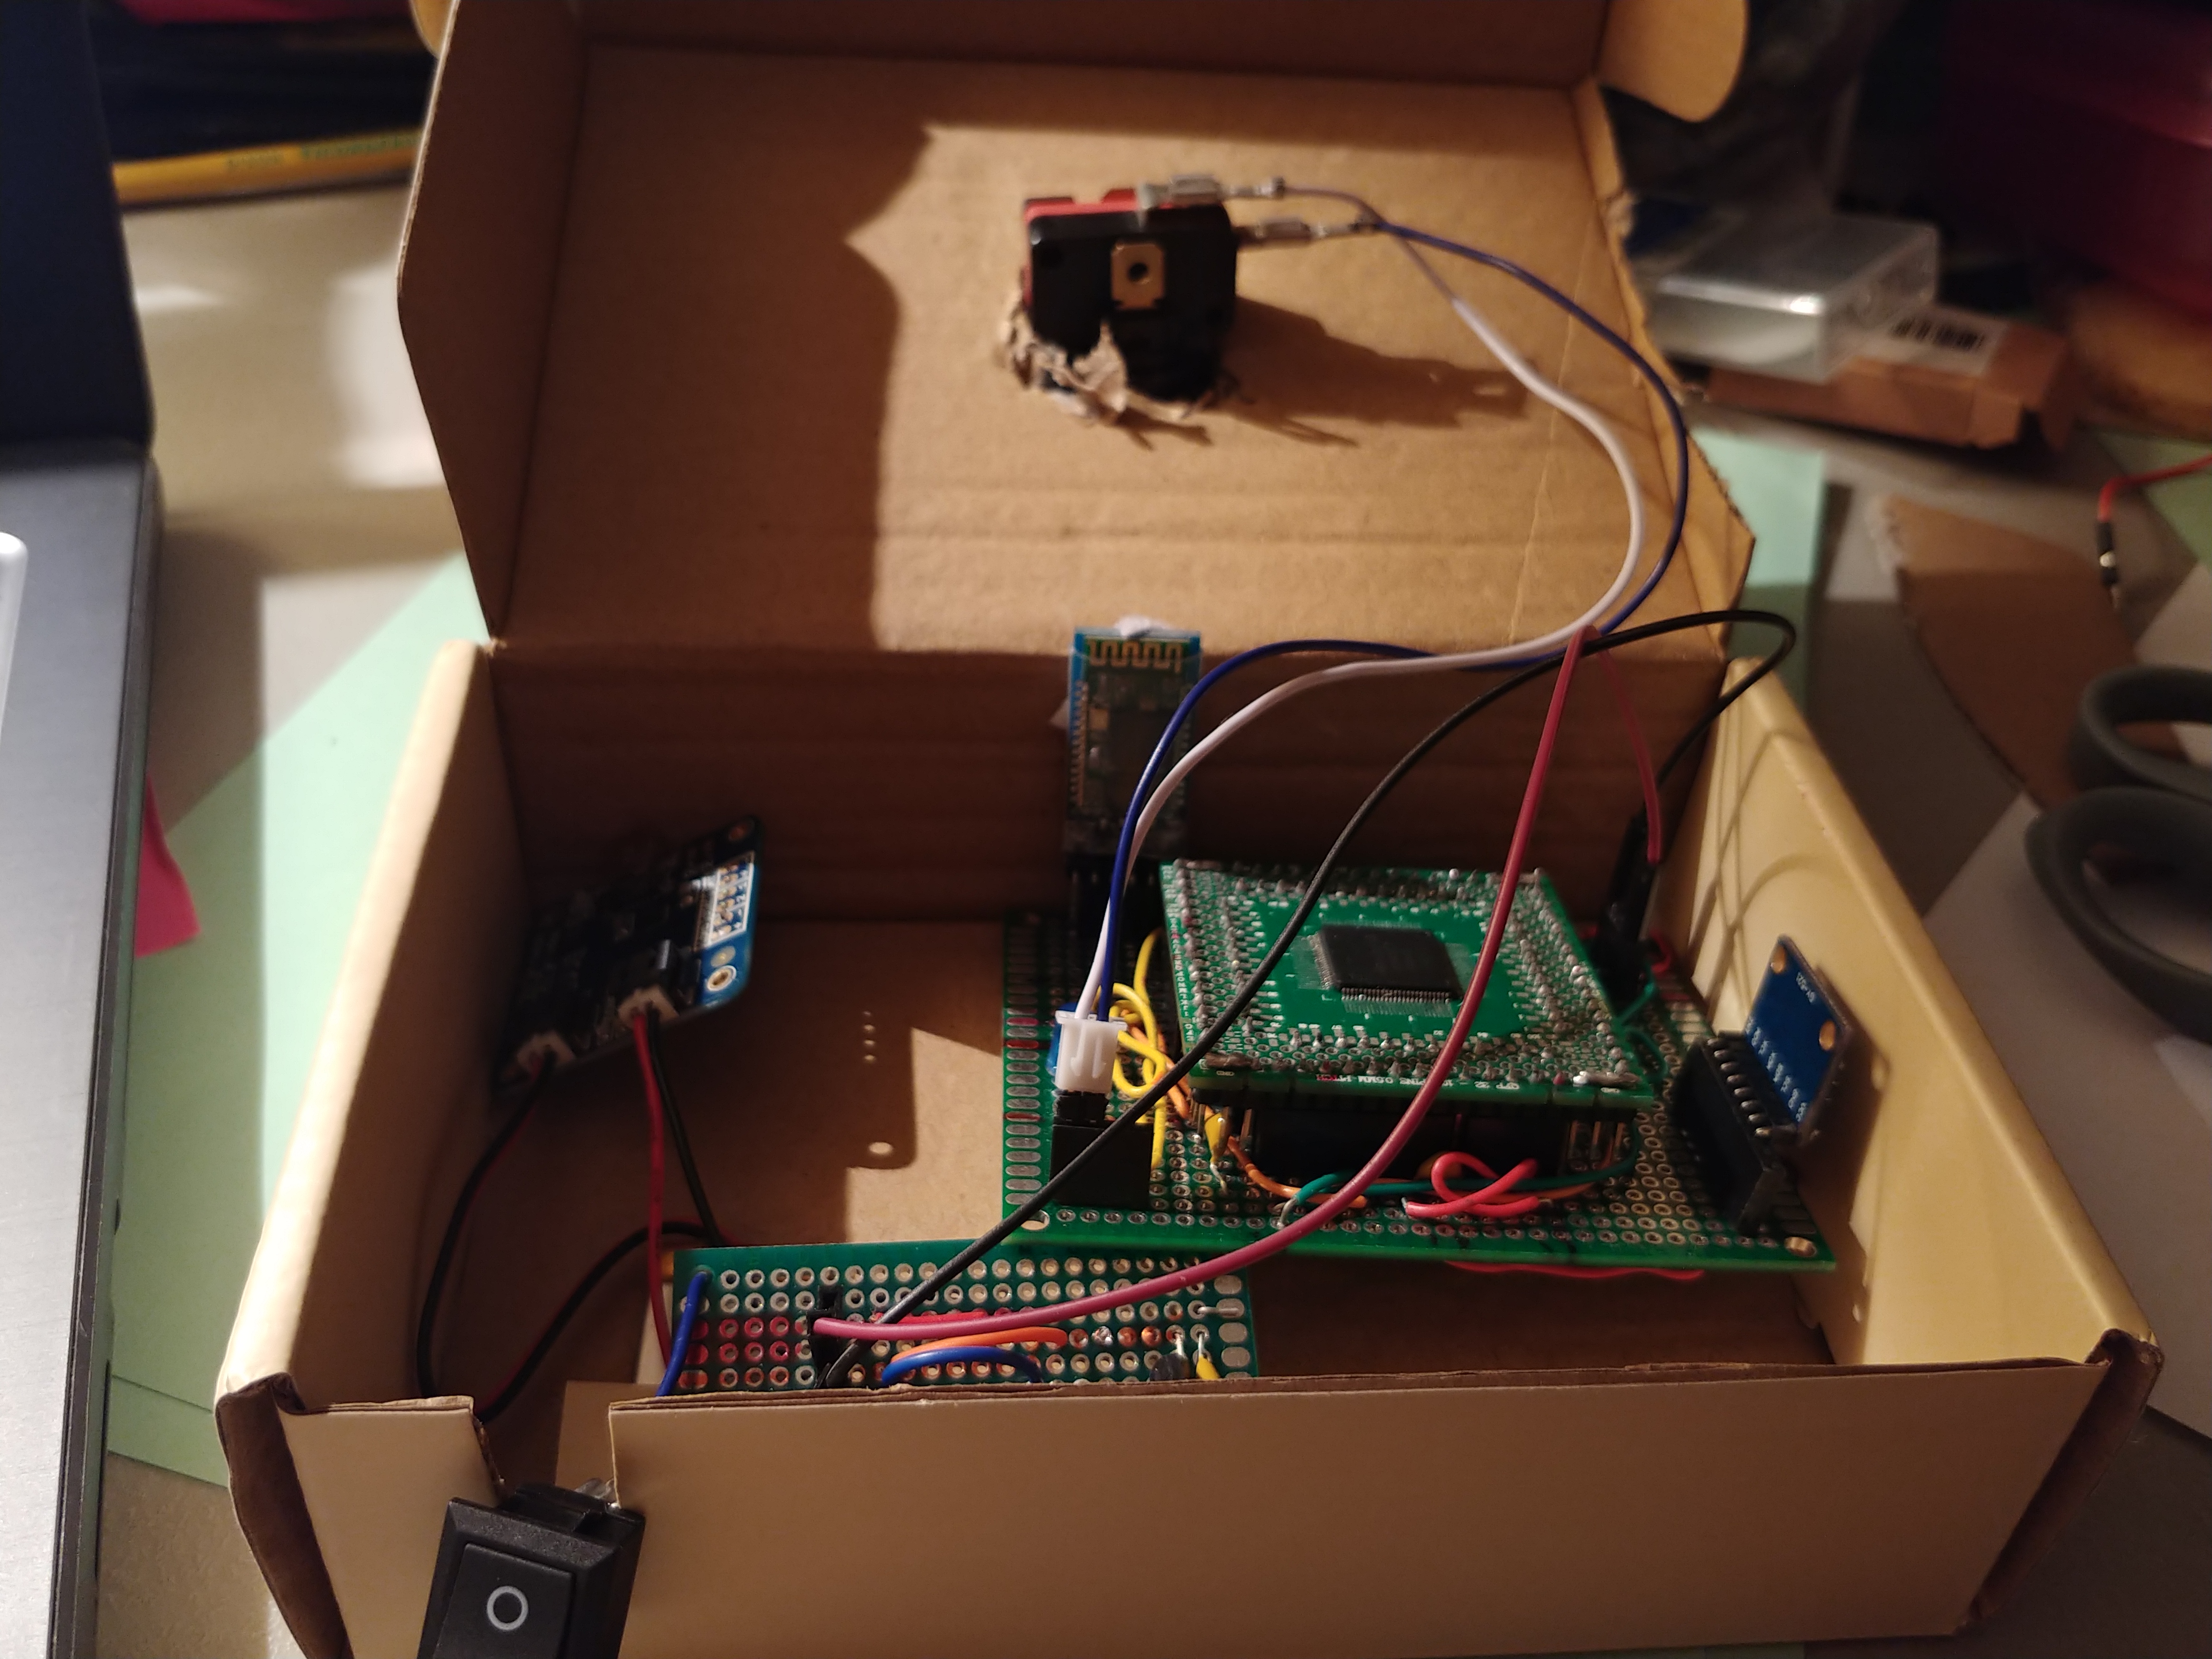
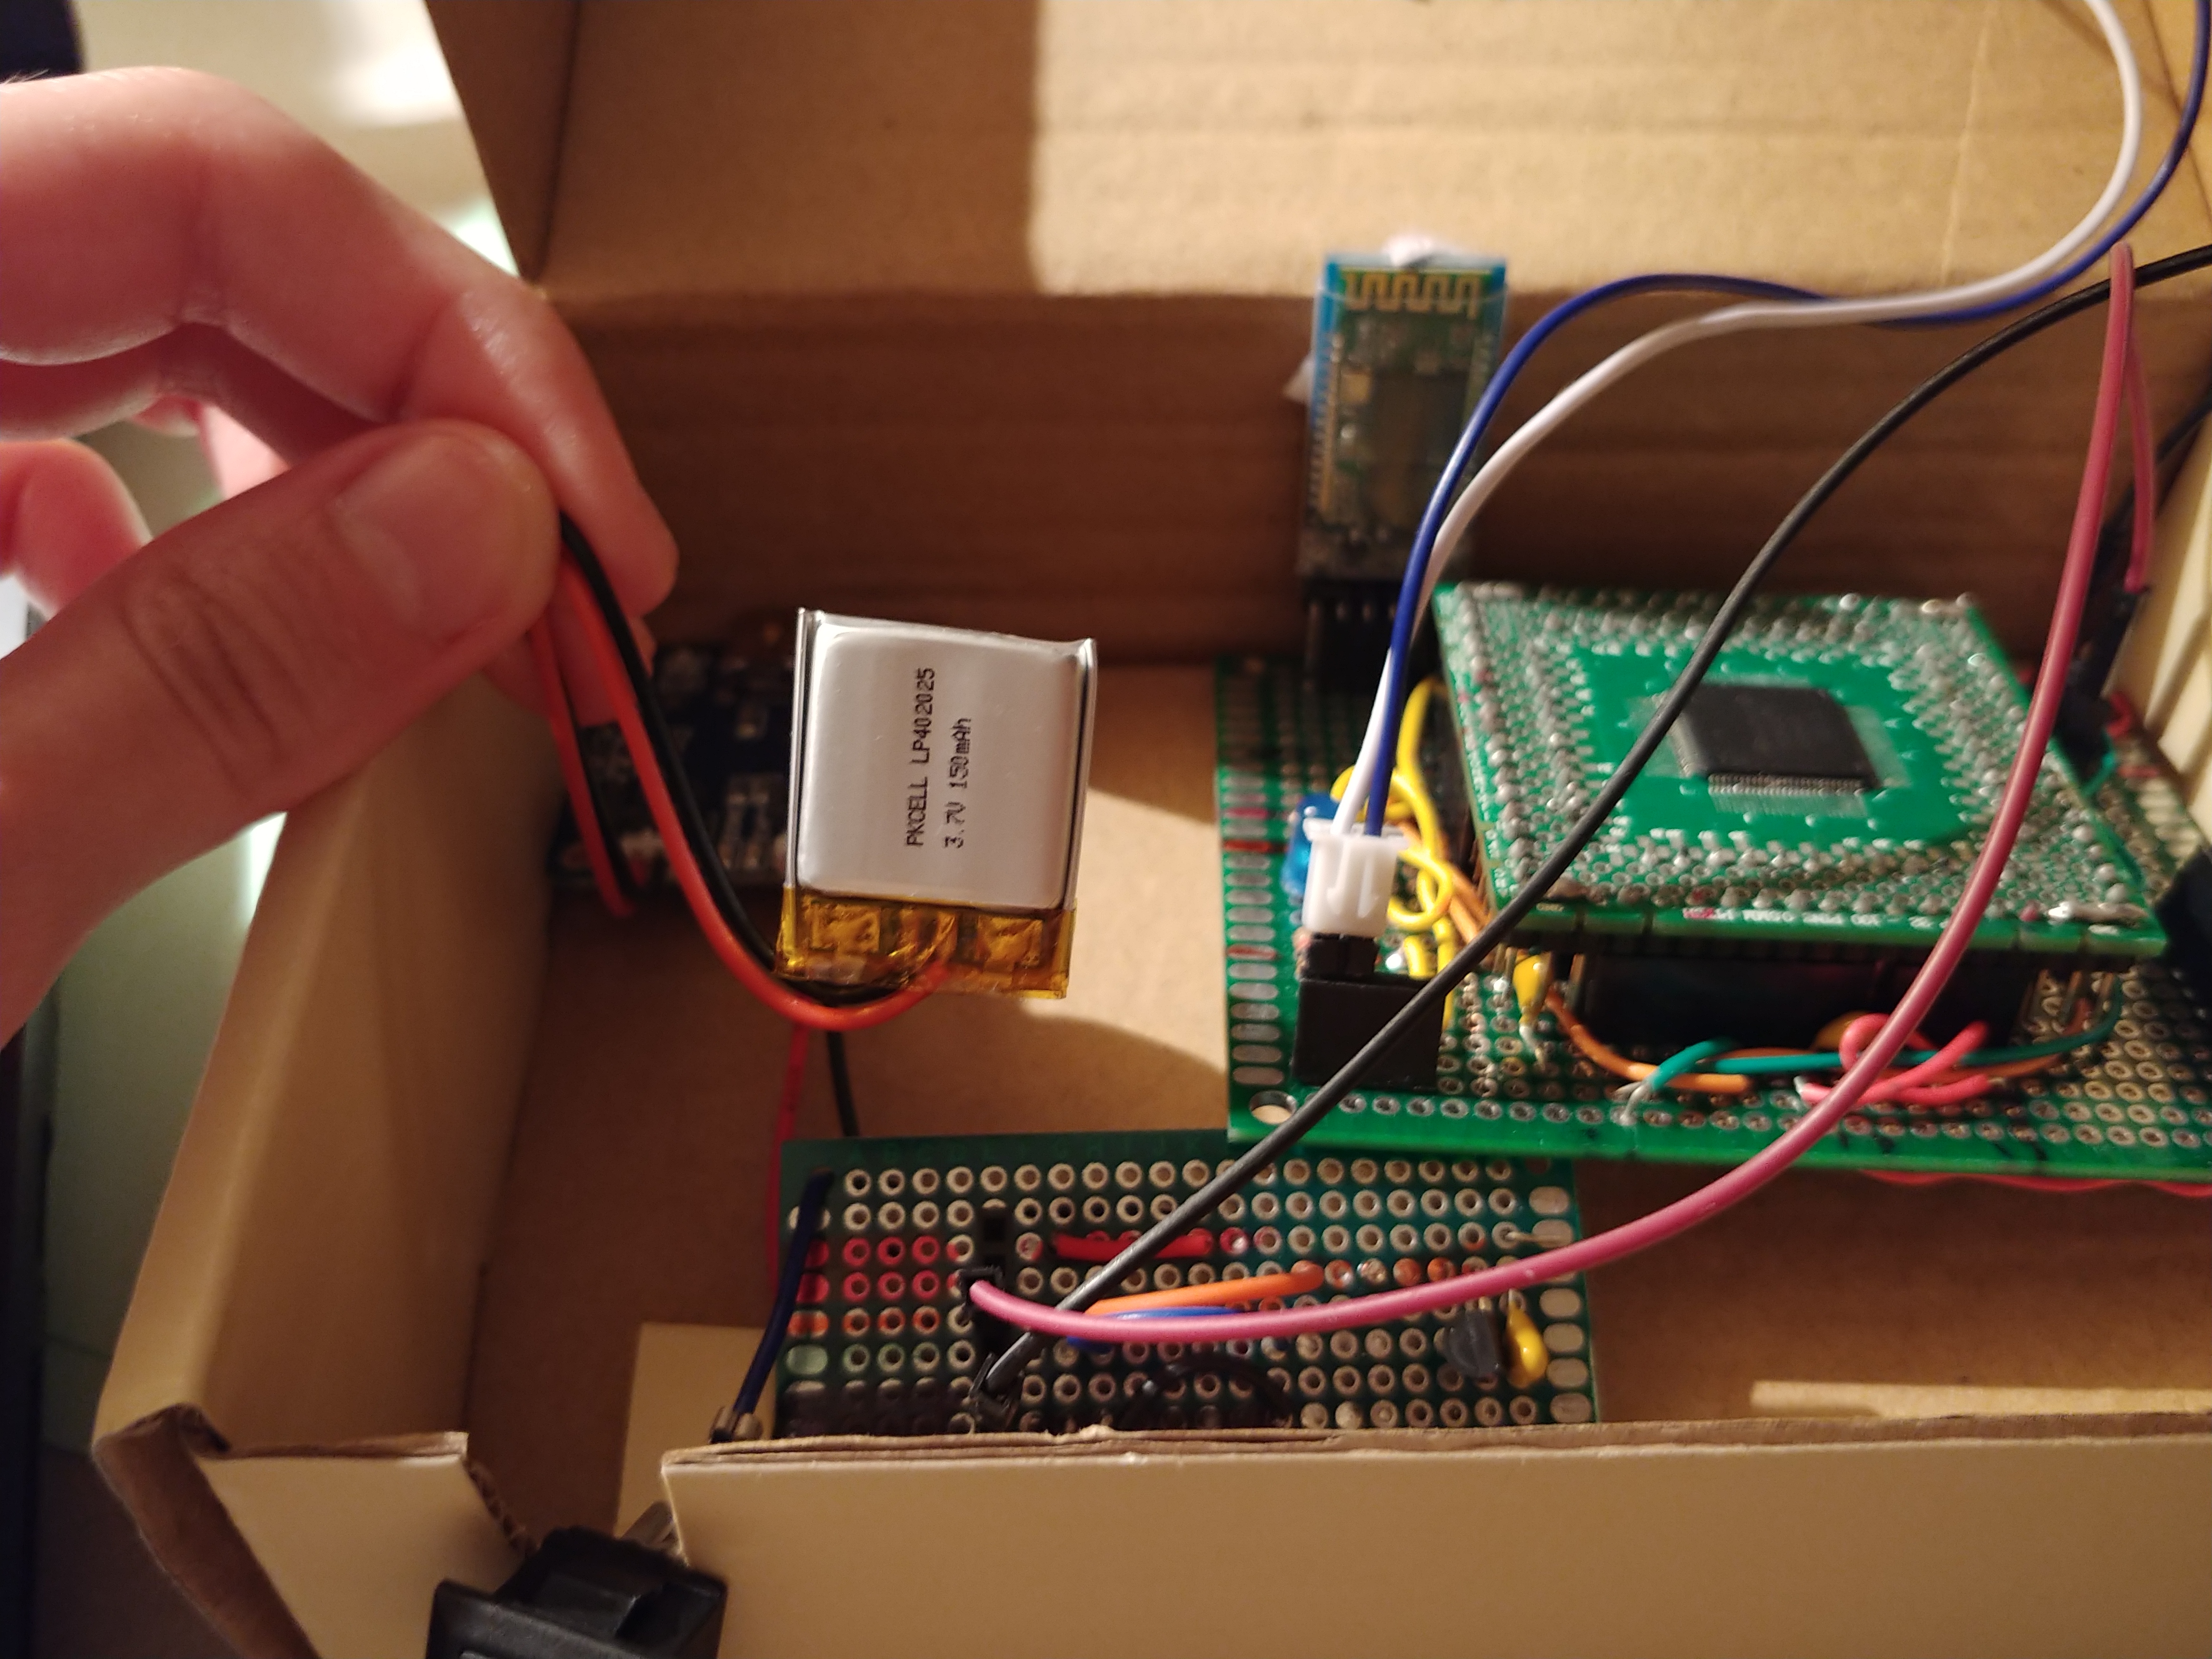
The pictures below are of the MSP430 schmartboard, the 150 mAh lipo battery, and the button we are using inside of a makeshift box. Our project box should arrive by the end of the week, so until then we are using a cardboard box.

The protoboards will be secured with hook and loop tape before they are used.


At the end of each game, a progress report is generated with the student’s decisions, reaction time and a separate gyroscope/accelerometer report.

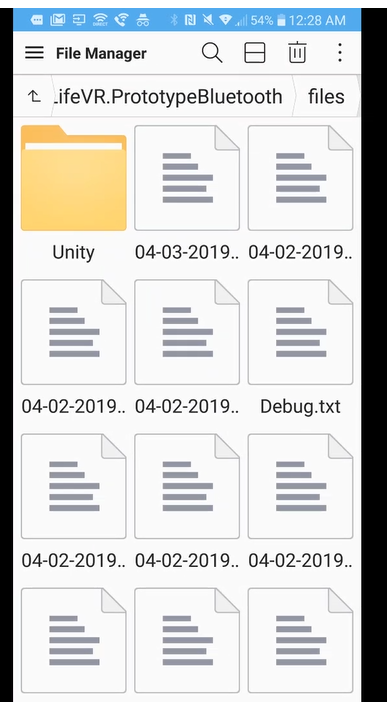
Each file is stored on the Android with the date, time and description of the file. For example, the file uploaded with this post is called 04-02-2019_11_51_06_Gyro_File (04-02-2019_11_51_06_Gyro_File) Please note that the files are stored as text files, but this website will not allow txt files to be uploaded, so it is uploaded as a PDF.

Also shown below is a gyroscope report generated. The format of the message is:

gyroscope x data \t gyroscope y data \t gyroscope z data \t acceleration x data \t acceleration y data \t acceleration z data \n\r

Unity parses the message by looking for the end of line characters (\n\r). We experimented with different ways of parsing data– for example, at one point we were parsing by \t characters, and at another point by checking if the incoming data was a number (%d). However, these did not reliably parse the data and caused formatting issues (which made analyzing data harder). We determined the most reliable way of maintaining 6 separate columns was through using the end of line character. We also augmented our progress reports by adding in the time of the game starting, the time at pauses and the time at resumes.

Our game utilizes Bluetooth to connect to the MSP430. However, there can obviously be problems with connectivity that have to be conveyed to the user so they can address the problem. (For the most part, power-cycling the button device, or charging the battery if it is too low. However, we have a separate error message for the battery being too low.) Our error message tells the user to restart the button device. We will make it clearer to turn off and on the power switch on the button.

Another way we indicate to user if connection is established is through the green start button on the menu. It is a little hard to see in this video (which was cast directly from Android to a computer screen) but the button starts out a dark, greyed out color which cannot be clicked on by user. The button is disabled until connectivity is established. You can see that in this video– when the message says “ready and connected” the start button illuminates and becomes clickable.

Demo of Bluetooth Connectivity

When connectivity is not established (for whatever reason), the script will automatically attempt connection two seconds later. This will repeat until connection is established.

We may want to put an additional error message which times out after connection fails too many times. We may also want to alert user that they may need to charge their battery. After all, the only way we can send a low battery message to the Android is through Bluetooth… which does require power. It is possible the user may leave the battery running for an extended period of time (with or without use of the phone), and then try to start the game, at which point the battery will be too low to send a message anyways.


We also utilized the button to pause the game (the skybox shown in the video). We need to make a much more visible “pause” for the user to see. When the game is paused, a stop signal is sent to the MSP430 to tell it to stop reading gyroscope data until the game is unpaused. This stop signal helps to reduce unnecessary current consumption.

Through the use of a Chromecast we were able to project the game onto a TV screen to demo our prototype. Our prototype includes two levels easy and hard, so far. Here you will be able to see how students view the game and what options the students have to navigate through the different paths of the game. We have used this prototype with our second focus group to see how they react to a more challenging path, since they stated that the first level was too easy. This demo is to show the progress we have made from the last focus group.

Focus Group #2

The goal of the second focus group conducted was to take the second prototype create, which included a second, more difficult, level, and have it tested by the same group as focus group #1. It is the same scenario where the students must navigate through the Giant grocery store by GMU and get the Campbell’s chicken noodle soup after seeing that it is out of stock on the shelf.

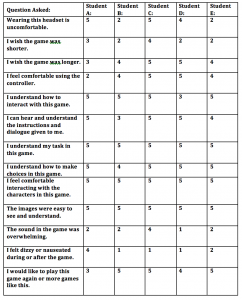
During the focus group, we were supposed to have the same exact 5 students as the first focus group, however 2 of them were absent so we had 2 new students fill in for them in order to still have 5 students reviews of the game. Each student had a turn in the swivel chair, which this time had the gyroscope attached to it, and they played through the hard level of the game as if they were playing the game normally. We tried not to give them any information about the game so we wouldn’t sway the results, but if they asked for help we would give them tips about what their next step should be. Then after each student took their turn with the game, one of the group members would sit down with the student individually and go through the same list of Likert Scale questions and open-ended questions from the first focus group and we would write down their responses. We also timed the amount of time each student took to complete the game.

Overall the second focus group did not go as well as the first one, however we got very good feedback because of this, in order to implement before the final focus group. The biggest issue was that the game crashed 3 times while we tested. It crashed once during one students turn, and then 2 times during another students turn, who after the second crash decided to be done with playing the game. After the first focus group, the students said that the game could be more difficult, so after they tried the harder level they said they liked the new difficulty level because it took more thinking and was not so quick. They also gave very good suggestions on how the game could be improved. One thing that was suggested was to have an option on the screen to click for a hint if they got stuck. Also, they said they think it could be even more complicated still. Overall, most of the students still really enjoyed playing the game, even with the glitches that occurred.


The main goal before the next focus group is to work out the technical issues of the game to ensure that it would not crash. Also, we will be implementing the text to speech aspect of the game so that the text on the screen is read aloud as well. Finally, if time allots, we can implement some of the minor suggestions that the students made, such as adding optional hints.

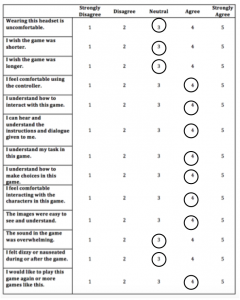
Likert Scale:

Average Responses

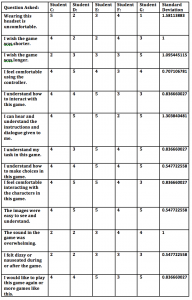
Every Response w/ Standard Deviation


The goal of the first focus group conducted was to take the first prototype created that can be used as a game, and have it tested by the group that this game is being created for. The prototype had a game where the user would wear the VR headset and be in a grocery store setting. They would have to navigate through the store in order to get Campbell’s Chicken Noodle Soup after seeing that it was out of stock on the shelf.

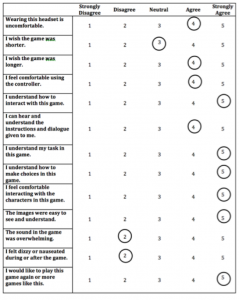
During the focus group we had five students from the MasonLIFE program that were picked specifically by the administration of the group. These five students will be the same students used during every focus group moving forward now, in order to see growth in the reactions based on changes we make to the game. We tried not to give them any information about the game other than a very broad generalization before the focus group started, so they could ask any questions if there were any concerns. Each student had a turn sitting in the swivel chair and playing through the prototype like it was a normal game. Then, after their turn with the game, one of the group members would sit down with the student individually and go through our list of Likert Scale questions and open-ended questions and we would write down their responses. We also timed the amount of time each student took to complete the game. The Likert Scale responses are seen below.

Overall the focus group went really well. It took the students on average about 5 minutes to finish the game. The only technical issue that occurred was that during the last student’s turn to go, the game shut down and the phone needed to be restarted. But when the game was being used, there were no issues with any technical aspects. Also, the students gave us very good feedback. The most common comment we received was that the students wanted a game that was more challenging and also more fun, like a quest. Also, one student added that they did not know when the game was over. The students told us that they like the interactions with the people in the game and being able to make the choices within the game. Overall the students gave a very positive response to how the game worked, but simply wished for a more exciting experience.


The plan is to implement the suggestions that the students gave us, as well as add more functionality to the game that needs to be included. An end screen when the student accomplishes the goal of the game will be added. Also, the game will have an internal clock to time the game usage instead of having to time them while they use it. Finally, the main goal is to add another level to the game in order to make it more challenging. This will let the students have more fun with the game, which will in turn allow them to benefit from practicing the difficult scenarios as well.


Likert Scale:

The video below shows the output of the gyroscope/accelerometer on the Schmartboard to a serial terminal. This data has been successfully sent to Unity, but it is difficult to get screen captures from the game that actually show the data being read in without lag. So, we are demoing the reading of data on a serial terminal. We are using a 3.7 V lipo battery which is rechargeable through a USB port. We also use a low dropout regulator (LDO) with low quiescent current to drop the voltage down to 3.3 V for operation of the MSP430 and its peripherals.  There are also some decoupling capacitors placed between the output of the LDO and ground. We bought some rocker switches, which are really tactile, to switch the power on and off.

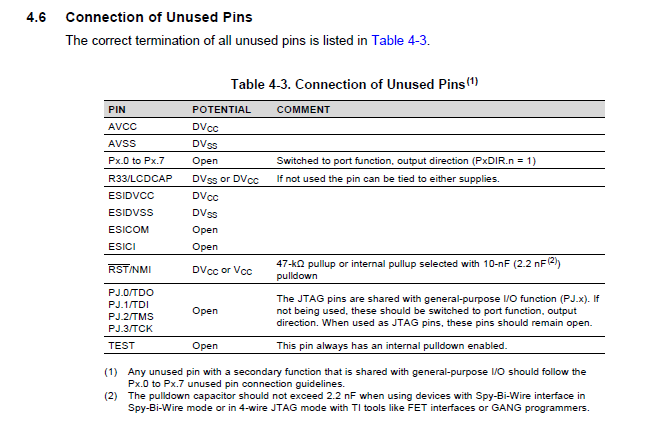
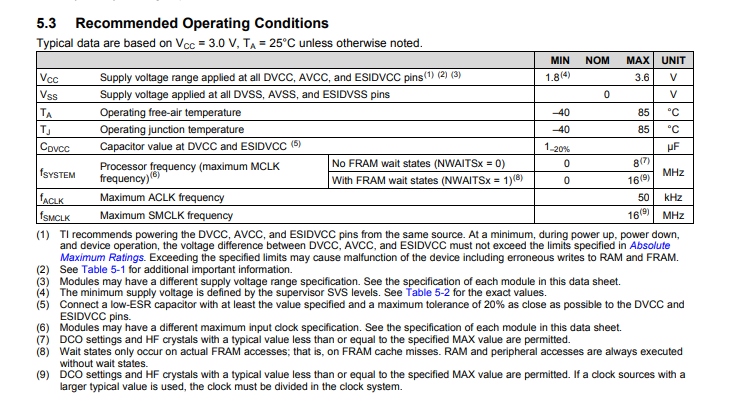
We learned that in order to run the MSP430 off this battery/LDO combination, we have to utilize the Chart below from the MSP430 data sheet:

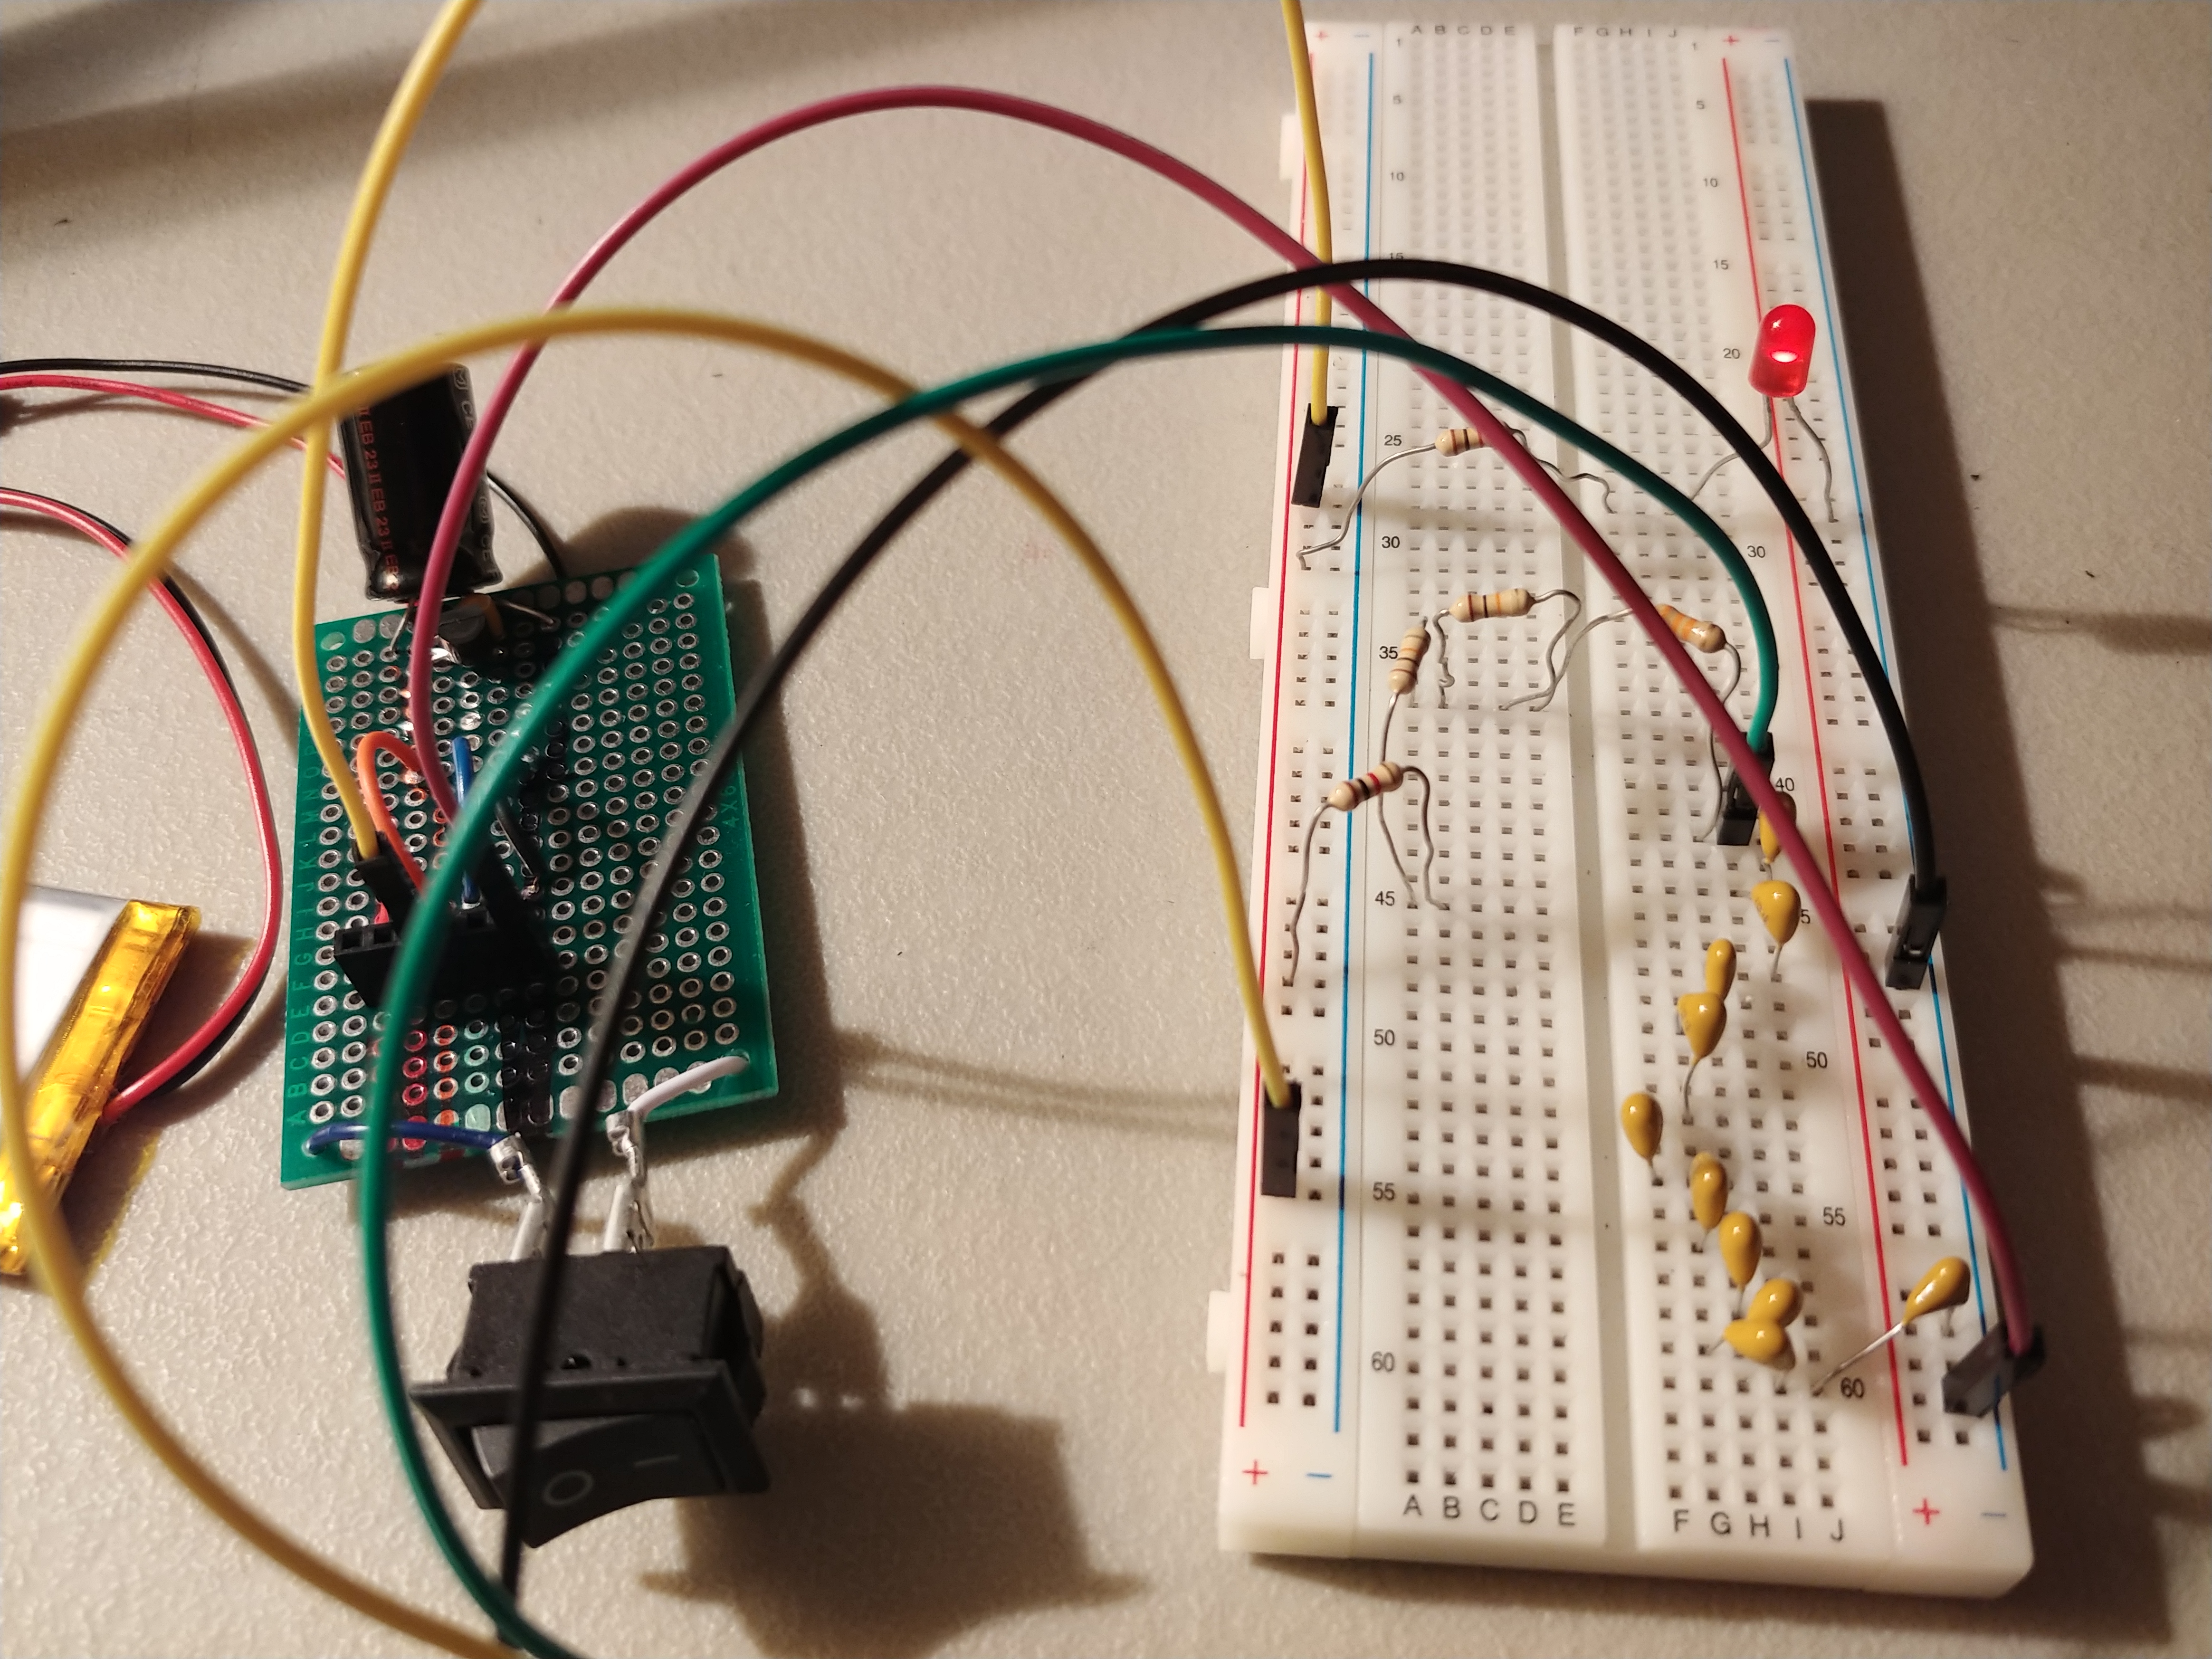
The main problem we faced before was not connecting /RST with a pullup resistor of 47kOhms and pulldown capacitor of 100 nF.  If the RST pin isn’t pulled high, the MSP430 will not run code. The capacitor is also EXTREMELY important. At first, I used a 0.1 uF capacitor just because some of these recommendations aren’t exact, and I read TI forum posts indicating some people had success using larger capacitors than recommended. (And I only had 0.1 uF on hand.) But my code did not run at all. No interrupts were ever triggered, and no communication with the Bluetooth module could be established (although it could still be successfully paired, as the pairing is not reliant on UART communication through the MSP430).

I did not have a 100nF capacitor on hand, so I put 10 0.1uF ceramic capacitors in series. I also did not have a 47 kOhm resistor, so I used a series equivalent. Obviously, we will acquire the correct valued capacitors and resistors for our PCB, but it was good to confirm the function of our circuit. I will also solder a small protoboard with these resistors and capacitors so we have a more permanent circuit than a breadboard. However, we did confirm that our circuit does work.


The first video below shows the Schmartboard after it was programmed by the MSP430 launchpad. It shows the connections of each breakout board.

The second video below shows the output from the Schmartboard chip to an Android Bluetooth terminal similar to the one used within Unity. It shows the gyroscope data being read in, as well as showing the button press pausing the reading of data from the gyroscope. (Displaying data from the Bluetooth terminal within Unity often causes the game to lag. Our game does not display data within Unity– it saves it in a list and logs it to an SD card. So we chose to demo with an Android Bluetooth terminal that can more easily show the data being sent to Unity.) The “Button paused.” messages causes a flag to be raised within Unity to toggle pausing the game.


It is important to follow TI’s recommendations when powering the chip, which are outlined in the Recommended Operating Conditions in SLAS789D, pg. 29. The Recommended Operating Conditions also clearly states that all VCC pins and all VSS pins should have the appropriate voltages applied to them, even if you aren’t using the chip’s analog capabilities.

Taken from  SLAS789D

On the 100 pin IPZ package, there are a total of five VCC pins (which should be connected to +3.3 V):

  • Pin 99 – DVCC3
  • Pin 79 – AVCC1
  • Pin 75 – ESIDVCC
  • Pin 58 – DVCC2
  • Pin 27 – DVCC1

There are a total of seven VSS pins (which should be connected to GND/0.0V):

  • Pin 98 – DVSS3
  • Pin 86 – AVSS2
  • Pin 83 – AVSS1
  • Pin 80 – AVSS3
  • Pin 76 – ESIDVSS
  • Pin 57 – DVSS2
  • Pin 26 – DVSS1

The Recommended Operating Conditions also show the placement of decoupling capacitors between each set of VCC and VSS pins:

When all of these connections are made properly, and SBW connections are made properly, the chip should be easy to flash in Code Composer Studio. Use a multimeter to check that each pin is receiving the appropriate voltage.

Next Page »